WARNING: Redirecting without informing the subscribers that they need to verify their email can greatly reduce the verification rate.
Placeholder: ~source~
Advanced Form Settings
(for form tag)
(for form tag)
No list manager is selected now
To collect emails, you must connect this form to a List Manager. You can change the List Manager anytime.
Select a Row type to add
If unsure, choose 1-column Row.
1-Column Row
2-Column Row
50-50
Left on top
Right on top
40-60
Left on top
Right on top
60-40
Left on top
Right on top
3-Column Row
Dedicated Row For Ad Widget
Dedicated Row For Paypal Payment (Pro Member Only)
Change the column type for this row
50-50
Left on top
Right on top
40-60
Left on top
Right on top
60-40
Left on top
Right on top
Copy and paste the HTML opt-in form code provided by your autoresponder provider here. The system will merge it into this form.
Note: The form code should start with <form ...> and end with </form>. You should copy everything, starting from <form ...> including and until </form>. Everything before and after should be ignored.
✖
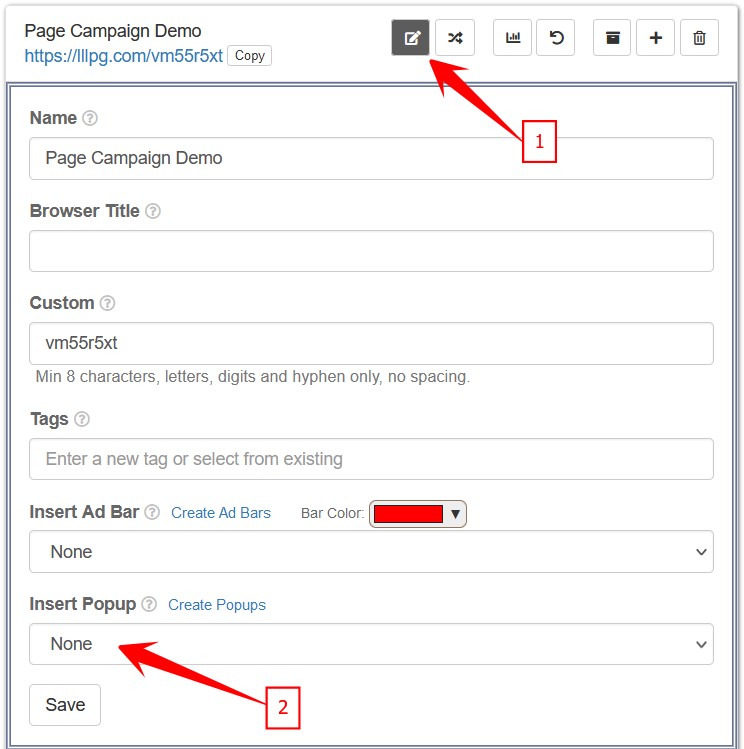
Popup CampaignID is set up in the Page Manager.
Go back to Page Manager (should be opened already in another tab), click 1, click 2, select the Popup. Then click Save.
Please note that the Popup CampaignID in this setting will only be updated after reloading.
✖
How to assign Class to an Element?
1) Click the Element to open its Editor. For example, if you want to assign a Class to an image, click the image to open its Editor.
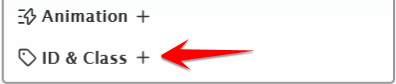
2) Scroll to the bottom section of the Editor. You’ll see something like this:
3) Click 'ID & Class +' to expand the options.
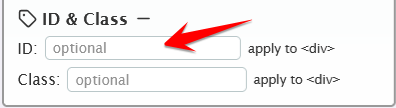
4) Enter your Class name in the Class input field.
5) A quick view of the assigned Class will appear at the top-right corner of the Editor.
Note: You can assign the same Class to multiple Elements. This lets you show/hide multiple Elements together.
How to hide an Element?
Before showing Element(s) by Class, you must first hide them.
To hide an Element, go to its Editor and click this
✖
How to assign ID to an Element?
1) Click the Element to open its Editor. For example, if you want to assign a ID to an image, click the image to open its Editor.
2) Scroll to the bottom section of the Editor. You’ll see something like this:
3) Click 'ID & Class +' to expand the options.
4) Enter your ID in the ID input field.
5) A quick view of the assigned ID will appear at the top-left corner of the Editor.
Note: An ID must be unique, unlike a Class.
✖
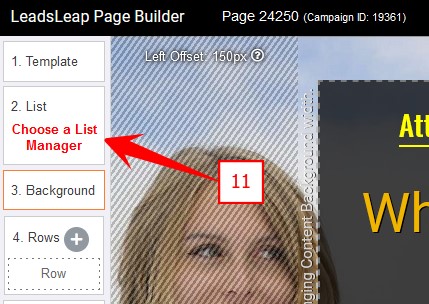
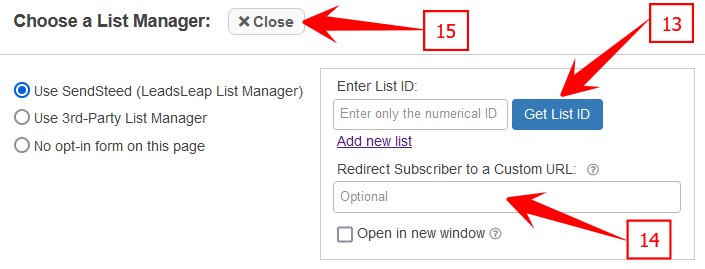
1) Click on '2. List' to show list options (arrow 11)
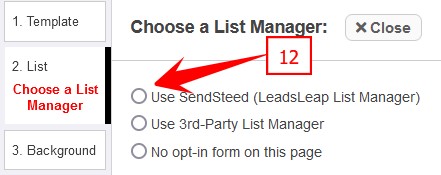
2) Select Use SendSteed (LeadsLeap List Manager) (arrow 12).
3) Enter the URL you want the subscriber to be redirected to (arrow 14).
Page and content backgrounds settings
Ad widget setting Other elements cannot be added
Paypal payment button setting Other elements cannot be added
Add New Element:
Tip 1: Sort editor to move element to front / back. Tip 2. Click and swipe over to group/ungroup elements.
The elements in this row cannot be edited. Only the Share Code provider can modify this content.
Page Background Settings
This image is not hosted in your LeadsLeap gallery. Consider saving it to your gallery in case it is deleted by the image host.
(0 - 20)
(-9 to 9)
Content Background Settings
Position & Size
px
vw
px
px
Appearance
Save elements as a set:
You’re about to save the element design in the selected row or column as a set.
To proceed, enter a name, then click Save.
Tip: Group these elements in one group before saving. They will remain grouped when inserted. It's easier to move them in a group later.
What is a Set?
A Set is a collection of Elements, or simply, the design in a Row/Column.
Saving the design as a Set allows you to use the same design again in other Rows/Column or in other Pages.
Possible applications
1) You have an opt-in form design that you always use, you can save it as a Set and import it to your other pages, instead of having to re-create everything again.
2) You have a header or footer with standard buttons and perhaps images that you will use in other Pages.
How to save a Set?
1) Click on the Row/Column that you want to save.
2) Click the Save as Set button (see the buttons below).
All the Elements in that Row/Column will be saved as a Set.
To insert a Set, click the My Set button to select.
Row Background Settings
Other backgrounds behind this Row:
Page:
Content:
Row Background & Appearance
This image is not hosted in your LeadsLeap gallery. Consider saving it to your gallery in case it is deleted by the image host.
(0 - 20)
(-9 to 9)
Warning: This element is outside its row/column. It may lead to unintended effects.
Position & Size
px
px
px
Text Edit & Appearance
Double-click the text to start editing or
px
(-180 to 180)
Animation
ID & Class
apply to <div>
apply to <div>
Warning: This element is outside its row/column. It may lead to unintended effects.
Position & Size
px
px
px
Link Setting
Placeholder: ~source~
Text Edit & Appearance
Double-click the text to start editing or
px
(-180 to 180)
Animation
ID & Class
apply to <div>
apply to <div>
Warning: This element is outside its row/column. It may lead to unintended effects.
Position & Size
px
px
px
Text Edit & Appearance
Double-click the text to start editing or
px
(-180 to 180)
Animation
ID & Class
apply to <div>
apply to <div>
Warning: This element is outside its row/column. It may lead to unintended effects.
Position & Size
px
px
px
px
Icon Setting
Action
Placeholder: ~source~
Replace your@email.com with your email address. Do not delete mailto:.
Warning: This element is outside its row/column. It may lead to unintended effects.
Position & Size
px
px
px
px
HTML / Video Code
Mute, Autoplay, Loop Settings:
By default, we activate mute, autoplay and loop. To turn any variable off, in the HTML Code above, find mute=1 (or autoplay=1 or loop=1) and change 1 to 0 (for Youtube and Vimeo) or delete the variable (for mp4).
Please note that browsers do not allow autoplay with sound. If you want the video to autoplay, mute must be on. If you want sound, autoplay must be off.
Appearance
(-180 to 180)
Animation
ID & Class
apply to <div>
apply to <div>
Warning: This element is outside its row/column. It may lead to unintended effects.
Position & Size
px
px
px
px
Setting
Day, hour, minute and second will all be shown.
Placeholder: ~source~
Animation
ID & Class
apply to <div>
apply to <div>
Warning: This element is outside its row/column. It may lead to unintended effects.
Position & Size
px
px
px
px
Paypal Payment Button Code
Warning: This element is outside its row/column. It may lead to unintended effects.
Position & Size
px
px
px
Autopx
Ad Widget Setting
Warning: This element is outside its row/column. It may lead to unintended effects.
Position & Size
px
px
px
px
Action
Placeholder: ~source~
Replace your@email.com with your email address. Do not delete mailto:.
This image is not hosted in your LeadsLeap gallery. Consider saving it to your gallery in case it is deleted by the image host.
(-180 to 180)
Animation
ID & Class
apply to <button>
apply to <div>
Warning: This element is outside its row/column. It may lead to unintended effects.
Position & Size
px
px
px
px
Input Setting
Incorrect Input Name will break your opt-in form. Make sure it is correct.
For SendSteed, please use these:
To Collect:
Use Input Name:
Email First name Last name Other custom fields
email name lastname any1word (e.g. tel)
(Uncheck if optional)
Appearance
px
(-180 to 180)
Animation
ID & Class
apply to <input>
apply to <div>
px
Delete border
px
px
px
px
Delete Shadow
px
px
px
px
Note: This visual crop expands and hides parts of the image to achieve cropping effect. For image, final view is dependent on the image's Position setting.